SimHub Bass Shaker Settings: ButtKicker and Pedal Haptics
This is every effect I run through SimHub on my rig, with the numbers, so you can copy the starting points instead of guessing at them. Two shakers under the seat set as rear left and rear right, plus haptic reactors on the pedals. The short version of my whole approach: haptics should tell you something, not just vibrate. Most setups I see fail because they run ten effects at once, and ten effects at once is indistinguishable from noise.
One caveat before the table, and it matters. SimHub's effect names have moved around between versions, and the labels below are the ones I use on screen in the video. If a name in your build does not match exactly, match by function — what the effect is reading from the telemetry — rather than hunting for a string. Every value here is a starting point I arrived at on my own rig, not a prescription; the lateral-G numbers in particular are car-dependent, and what works in a formula car is wrong in an MX-5.
| Effect | Where | Values I run | Purpose |
|---|---|---|---|
| Gear shift | Seat shakers | Strength 100%, rest near default | Immersion |
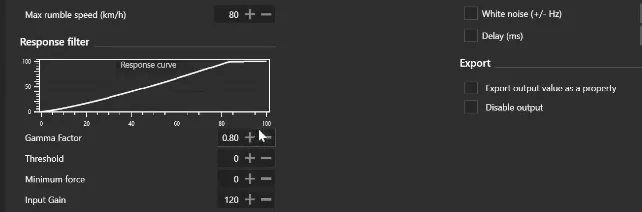
| Road rumble (kerbs) | Seat shakers | Left/right mode, gamma 0.8+ | Track limits |
| Lateral G, braking only | Seat shakers | 63%, gamma 1.2, 44/50 Hz, force 3–100 | Cornering load |
| Road vibration, throttle only | Seat shakers | Sensitivity 65, threshold 35, 48/55 Hz | Immersion |
| Road rumble | Throttle pedal | Not quantified on camera | Track limits |
| Gear shift | Throttle pedal | Not quantified on camera | Immersion |
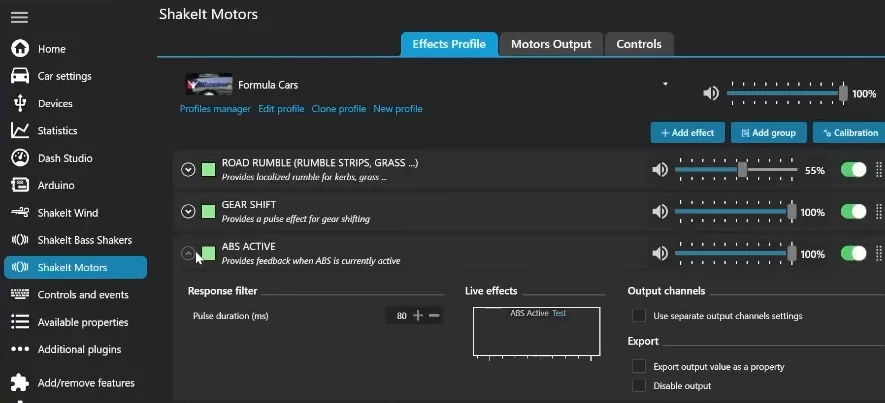
| ABS | Pedal reactor | Not quantified on camera | Braking information |
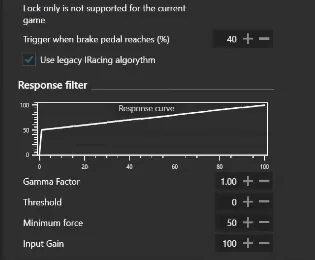
| Wheel lock | Brake pedal | Legacy iRacing algorithm, min force 40–50 | Threshold braking |
| Surface effects | Brake pedal | Deliberately off | Protects the brake trace |
Where a cell says "not quantified on camera", that is deliberate. I set those on screen without reading the numbers out, and I would rather leave a gap than print a figure I cannot stand behind.
Where you mount a shaker decides how much you actually feel
Before any of the settings matter, the position does. I would go as far as saying the mounting location is worth more than the tuning, because a perfectly configured effect bolted to the wrong part of the rig arrives at you as a dull thud through several metres of aluminium.
The ideal is the seat itself — bolted directly to the shell, so the vibration has nowhere to go except into you. Of the positions I actually tested on my own rig, the seat brackets gave the best result, and that is where mine live now. The further out along the chassis you go, the more the rig absorbs before you feel anything, and the more you end up compensating by raising gain until everything becomes one indistinct buzz.
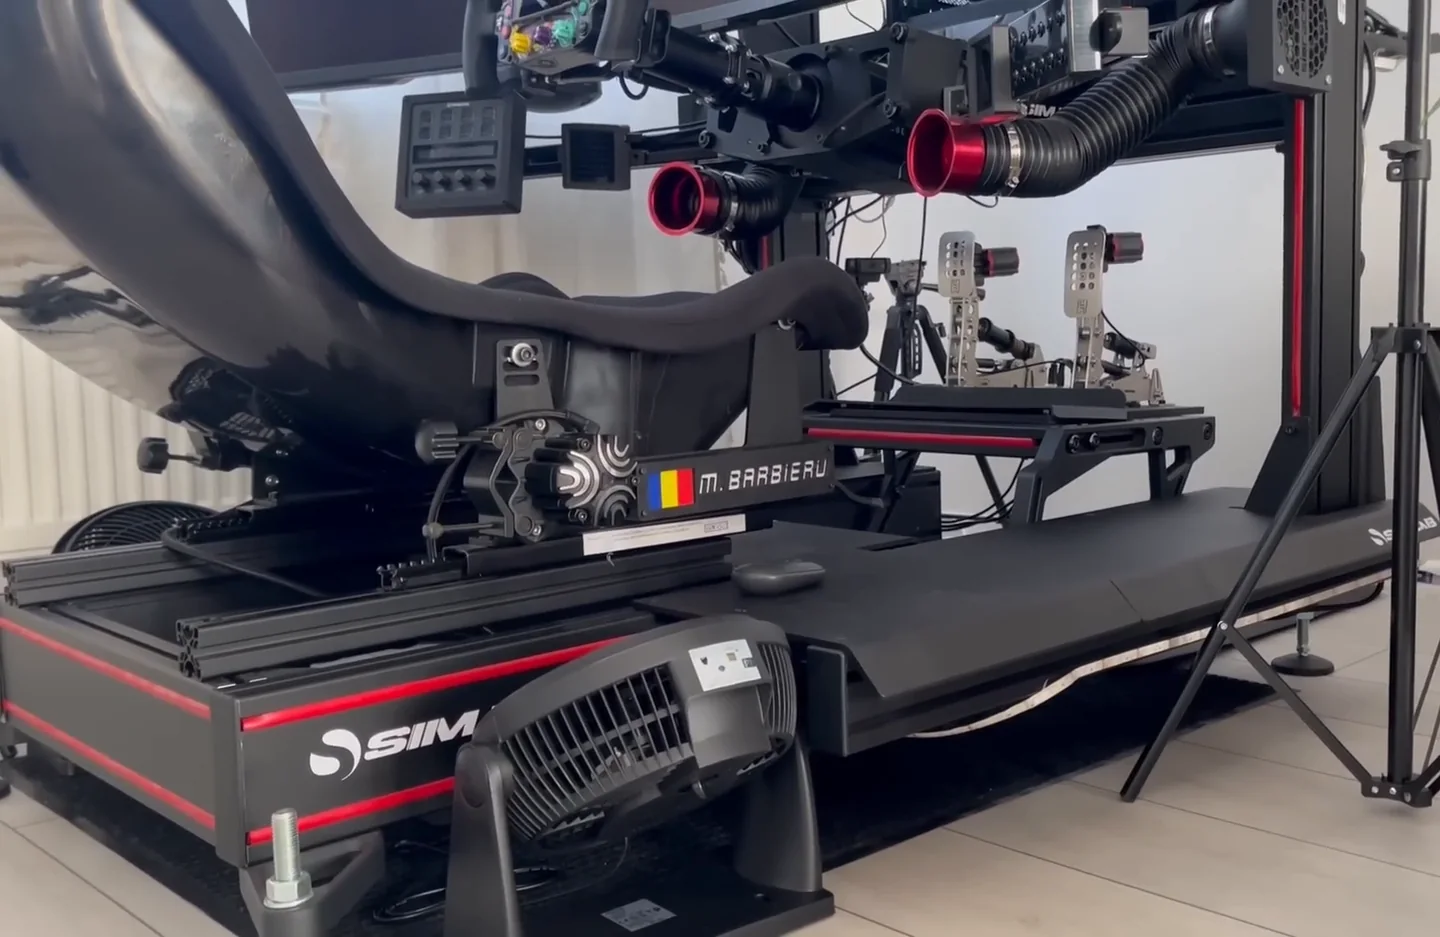
If your only option is a chassis rail, that still works. Just expect to need more amplitude for the same information, and expect the separation between left and right to blur.
Why both of mine are set as rear left and rear right
I run two units, one each side, and in SimHub they are assigned as rear left and rear right. The channel split is absolute rather than blended: the left unit is 100% left and 0% right, and the right unit is the mirror of that.
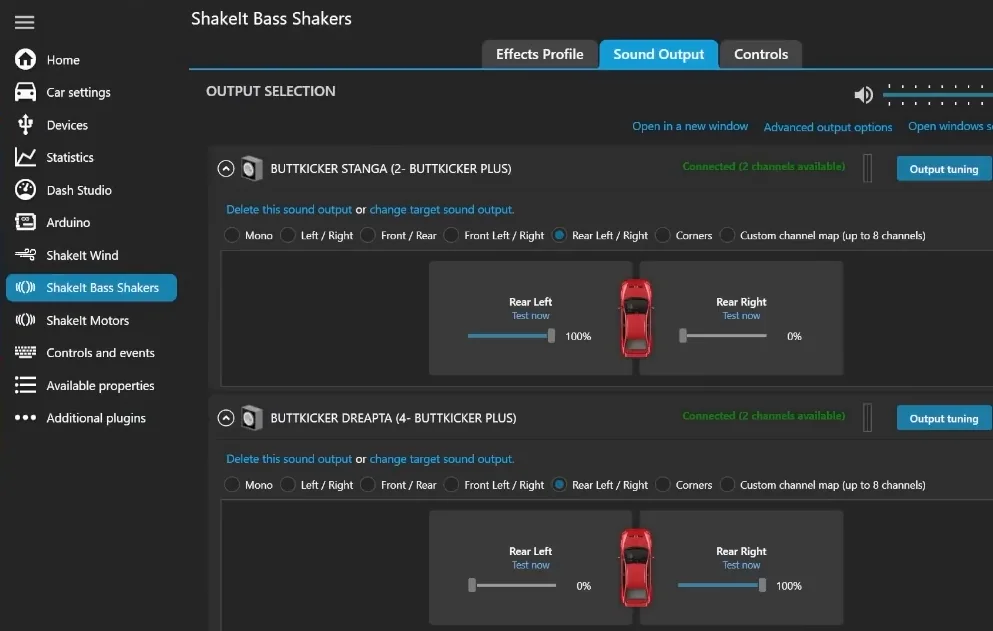
That matters more than it sounds. Once the two sides are genuinely independent, an effect that fires on one side only becomes information rather than decoration — you feel which side of the car did something, not merely that something happened. Blend the channels and you have spent money on two shakers to get one.
Corners, mono, and how many effects one unit can carry
SimHub's effect mode should follow your hardware, not your ambition:
- One shaker — mono. There is no spatial information to give, so do not pretend there is.
- Two shakers — left/right, as above.
- Four shakers — corners, one per wheel, which is where the per-wheel effects finally pay off.
The count also decides how many effects you can usefully run, and this is the part most people get wrong. Every effect you add is competing for the same physical driver. Two effects on one unit stay legible. Three is the ceiling. Ten at 20% each is not a rich setup, it is mush.
The four effects I run on the seat
Gear shift, road rumble on the kerbs, lateral G under braking, and road vibration under throttle. That is the entire list, and it is short on purpose. Two of them are there for immersion and I am honest about that; one of them I think genuinely helps lap time; one of them is a positioning tool.
Lateral G under braking: the only one I claim a lap-time payoff for
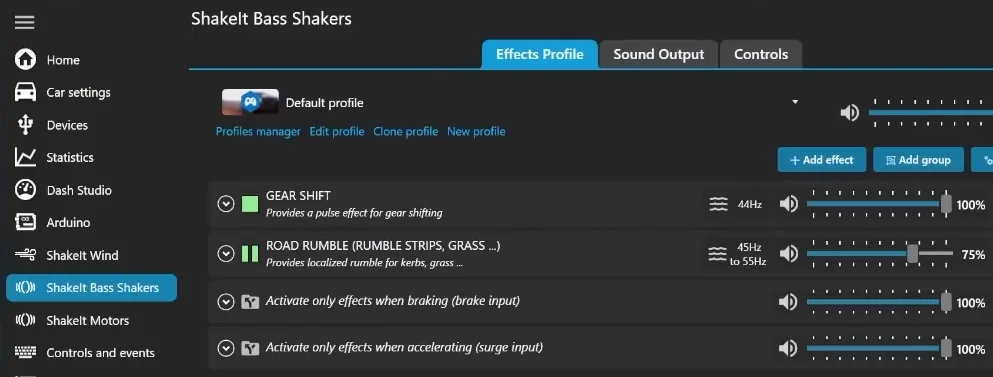
This is a custom effect built on lateral acceleration, and the trick is that I only let it fire under braking. Left running all the time it buzzes on every straight and teaches you nothing. Gated to the brake, it becomes a physical readout of how much lateral load you are actually generating on entry.
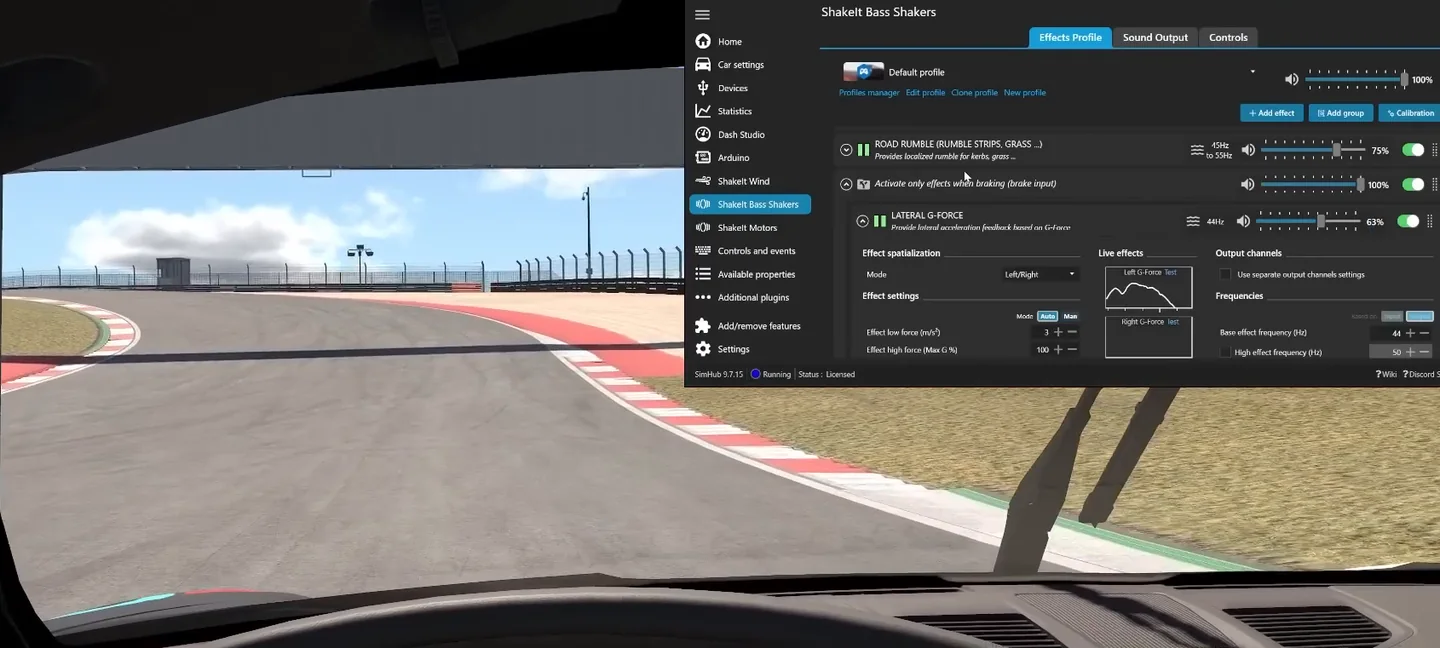
That is useful because load is the thing you cannot see. If a corner you know well feels weaker than usual through the seat, you are below the load you normally carry there — which is a far faster signal than noticing two corners later that the delta went red. My values:
My lateral-G settings
- Effect strength — 63%
- Gamma — 1.2
- Frequencies — 44 and 50 Hz
- Effect low force / high force — 3 and 100
- Mode — left/right, firing under braking only
Re-test these per car. A formula car generates lateral load an MX-5 never will, and the same gamma across both gives you a numb signal in one and a constant one in the other.
If you are chasing where the time actually goes rather than how the car feels, this effect pairs with the diagnosis work in why your lap times are inconsistent — the seat tells you something changed, the telemetry tells you what.
Road rumble on the kerbs, tuned with the graph rather than a number
This is the effect I would keep if I could only keep one, and it is the clearest example of haptics doing a job rather than adding atmosphere. Set to left/right, it tells you which side of the car touched the kerb, and how much.
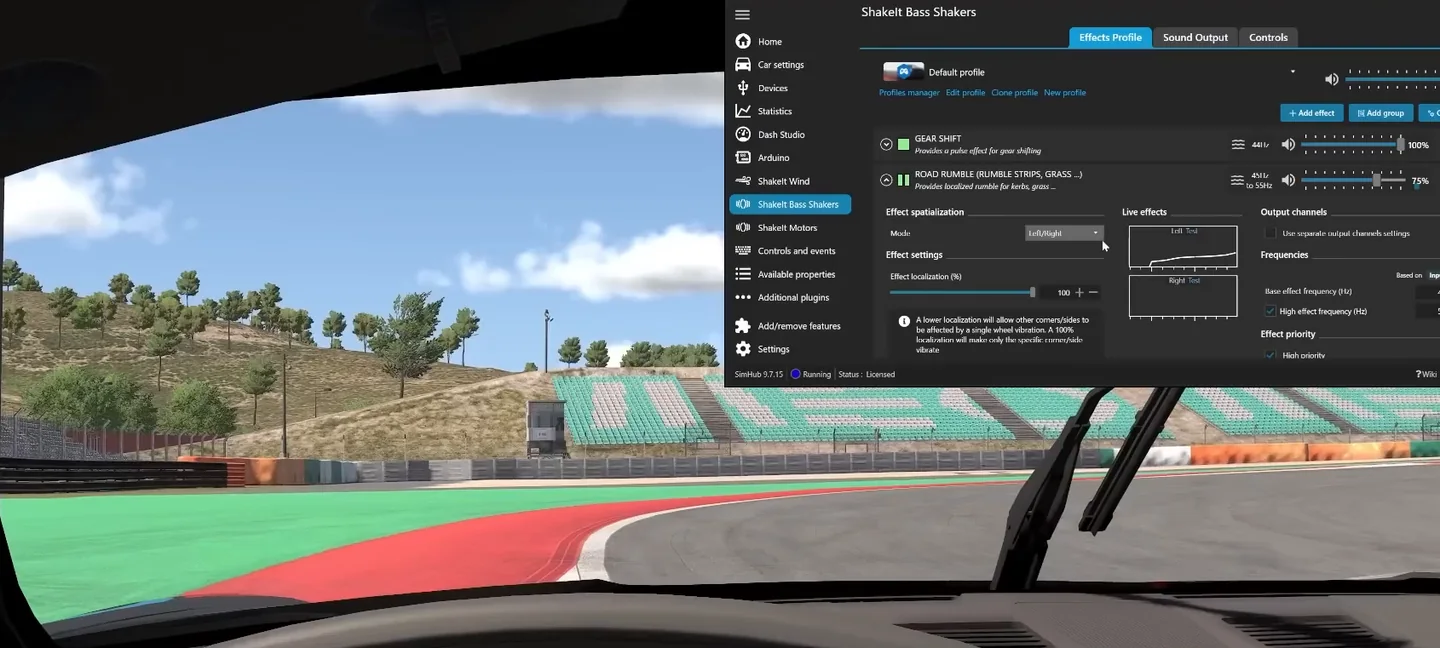
On a single screen — or any setup where the front wheels are out of shot — that is genuine positional information. You learn where the track limit is by feeling it, not by watching for a warning afterwards. It changes how confidently you can use the last few centimetres on exit.
For gamma I would not go below 0.8; lower and the small inputs vanish, which defeats the point. Beyond that I tune this one against SimHub's live response graph while driving rather than by typing values, because the right amount depends on your shaker, your mounting and your amplifier gain — three things that differ on every rig.
Gear shift: immersion, and I leave it near default
Strength at 100%, everything else more or less as SimHub ships it. It feels great and it will not find you a tenth. I keep it because racing should be enjoyable, not because it is doing anything for the lap, and I would rather say that plainly than dress it up.
Road vibration, throttle only
Sensitivity 65, auto threshold 35, frequencies 48 and 55 Hz, with the input gain and gamma pushed up a long way and a little white noise and delay added. Gated to throttle, deliberately off under braking — for the same reason as the pedals, which is the next section but one.
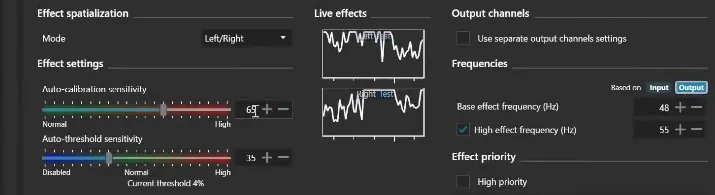
I tested this one hoping it would tell me something about suspension compression and elevation. It does not, really. It is an immersion effect and I have stopped pretending otherwise.
The three effects on my pedal reactors
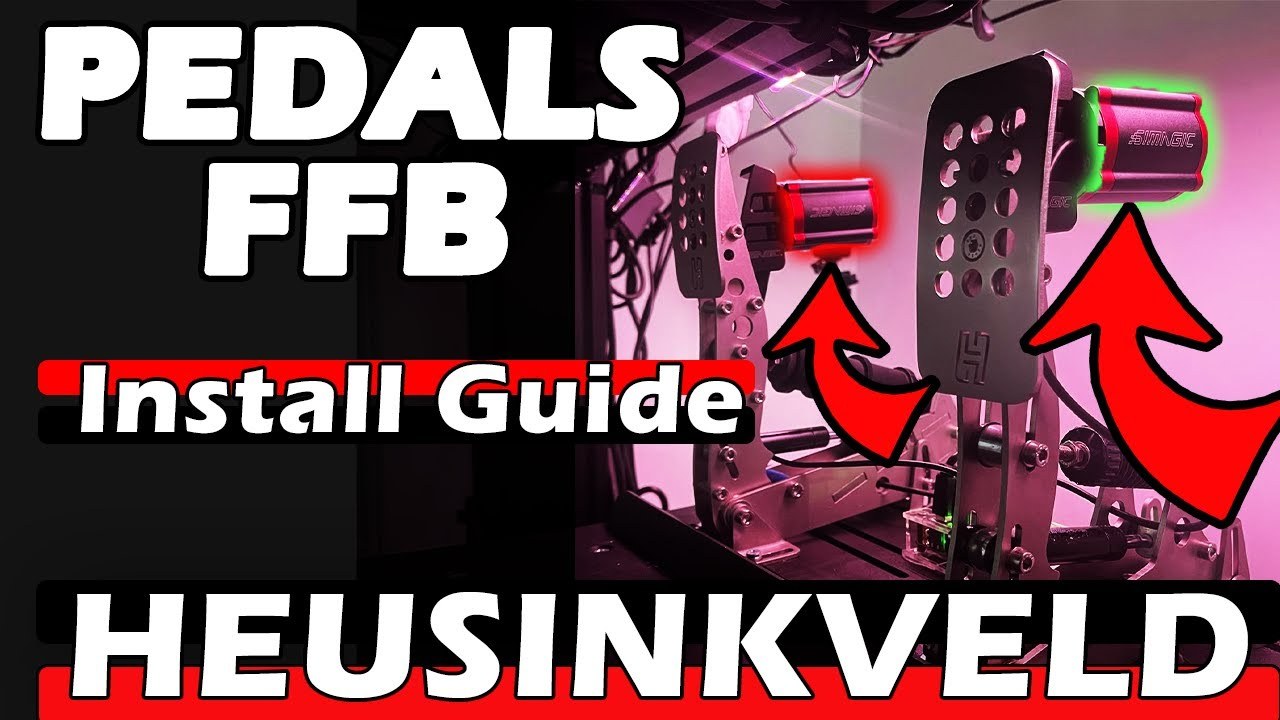
The pedals carry road rumble, gear shift and ABS. Both of the surface-type effects live on the throttle pedal only. The brake gets ABS and, when the car has no ABS, wheel lock — and nothing else. If you are still fitting the hardware, the physical side is covered in mounting Simagic haptic reactors to Heusinkveld pedals.
ABS on the pedal is the effect that pays for itself
Of everything on this page, ABS through the pedal is the one that impressed me most in testing. Feeling the system engage through your foot, at the moment it engages, is a completely different experience from noticing it afterwards — you can modulate against it in real time instead of reacting to the aftermath. In iRacing specifically it lines up well with the braking work in how to be faster in iRacing.
Wheel lock on the brake, and the algorithm it needs
For cars without ABS, wheel lock is the equivalent tool, and it is separate from the ABS effect — do not treat them as one setting. Two things about it:
- It belongs on the brake pedal. That is where the input you are correcting lives.
- In my setup it needs the legacy iRacing algorithm to behave properly.
Then raise the minimum force above 40 — I have used 40, 45, and up to about 50. The reason is that this effect has to cut through a brake pedal you are already standing on with real force. Default minimums are tuned for gentler inputs and simply disappear under threshold braking.
Why I run no surface effects on the brake pedal
This is the most important line on the page and the one almost nobody mentions. A vibrating brake pedal moves your brake trace — in my testing, a couple of percent up and down.
A couple of percent of throttle is nothing; you are usually at or near 100% and the car does not care. A couple of percent of brake pressure, during release, is exactly the region where trail braking lives and where rotation is won or lost. So the throttle carries the atmosphere and the brake carries only information it genuinely needs. If your pedals are moving under load in the first place, fix that before adding anything that vibrates — brake pedal tips covers it.
Ten to twenty minutes in, mine used to shut themselves off
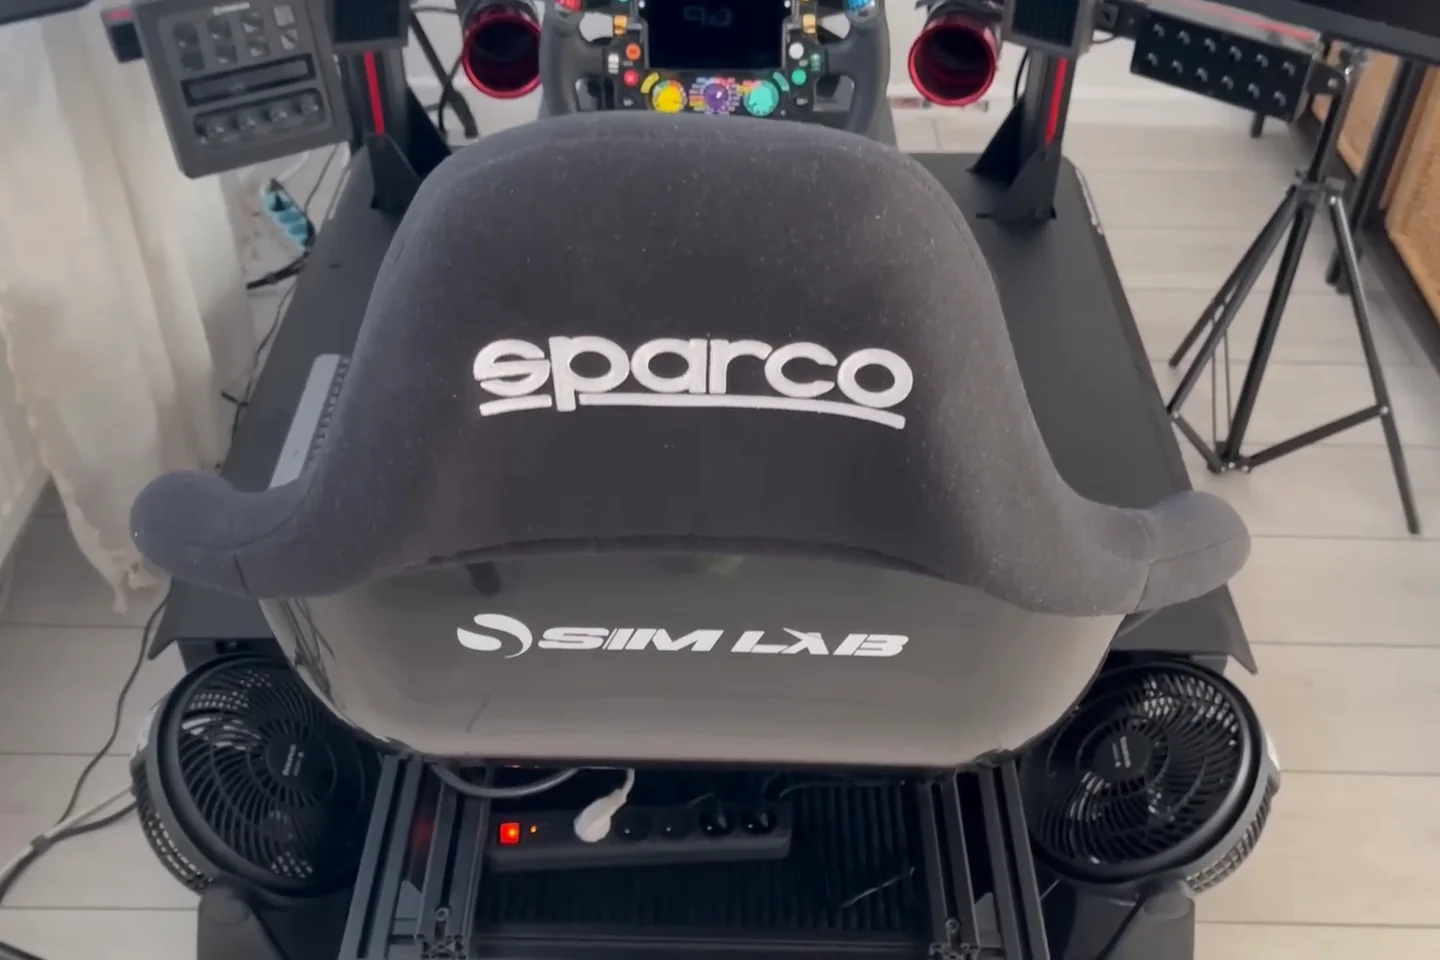
Worth knowing before you blame your software: run shakers hard and they get hot, and mine would cut out somewhere after the ten-to-twenty-minute mark on a longer session. Nothing was broken and no setting was wrong — they were simply overheating and protecting themselves.
My fix was unglamorous and completely effective: two ordinary floor fans, one per unit, on adjustable mounts so I could aim them properly. Since then it has not happened once. I am not saying every install needs cooling — plenty do not — but if yours goes quiet mid-stint and comes back later, this is where I would look first.
If you only have one shaker, run two effects
The single most common mistake with one unit is enabling everything at low strength. One driver cannot reproduce eight signals at once; you get an averaged buzz that tells you nothing and tires you out.
Starting points for a single shaker
- If you want information: road rumble, plus one wheel-behaviour effect. Two, maybe three at the absolute most.
- If you want immersion: road rumble and gear shift.
- Either way: run those alone for a week before adding anything. You cannot judge a third effect while five others are firing.
That restraint is the same principle behind good force feedback, where the goal is a clear signal rather than the strongest one — the force feedback settings guide makes the same argument about wheel strength. And if you are still deciding what to buy rather than how to set it up, the cheap upgrades guide covers where haptics sit against everything else competing for the same money.
Start with two effects, mounted close to your body, tuned until each one is recognisable on its own. Then add a third only if you can name what it is telling you. If you would rather have someone look at what your driving actually needs before you spend an evening in a settings menu, that is what the GitGud Racing Academy is for — send a lap and a coach tells you where the time is going.
SimHub bass shaker settings FAQ
How many effects should you run on one bass shaker?
Two, and three at the absolute most. A single transducer can only produce one waveform at a time, so every effect you add is competing for the same driver, and eight effects at low strength arrive as one indistinguishable buzz that tells you nothing. If you want information, start with a kerb or surface effect plus one wheel-behaviour effect. If you want immersion, use a surface effect and gear shift. Run those alone for a week before you add a third.
Where should you mount a bass shaker on a sim rig?
As close to your body as the rig allows. Bolting it to the seat shell itself is ideal because the vibration has nowhere to go except into you. Of the positions tested on my own rig the seat brackets gave the best result, and that is where mine live. The further along the chassis you mount it, the more the frame absorbs before you feel anything, and the more you compensate by raising gain until every effect blurs into the same buzz.
Should you put haptic effects on the brake pedal?
Only effects that carry braking information, such as ABS or wheel lock. Keep surface and kerb effects off it. A vibrating brake pedal moves your brake trace by roughly a couple of percent, and that is precisely the range where trail braking lives, so the noise lands exactly where you need precision. On the throttle it does not matter, because a two percent wobble near full throttle changes nothing.
Why does my bass shaker turn off after 20 minutes?
It is almost certainly overheating and protecting itself rather than failing. Driven hard, shakers and their amplifiers get hot, and mine would cut out somewhere past the ten to twenty minute mark on longer sessions before coming back later. Nothing was broken and no setting was wrong. Two ordinary floor fans on adjustable mounts, one aimed at each unit, fixed it completely and it has not happened since.
What is the best SimHub wheel lock setting for iRacing?
Put it on the brake pedal, since that is the input you are correcting, and keep it separate from your ABS effect rather than treating them as one setting. In my setup it needs the legacy iRacing algorithm to behave properly. Then raise the minimum force above 40, somewhere around 40 to 50, because the effect has to cut through a pedal you are already standing on with real force and default minimums simply vanish under threshold braking.
This guide is part of the free library at GitGud Racing Academy — an online sim racing academy built around weekly lap reviews, structured courses, drills and training tools.
Train this the right way
Reading is step one. Build it into muscle memory with structured, car-specific courses and personal lap reviews from a coach — inside the Academy.
Join the Academy · $49.99/mo incl. VATWatch the full video on YouTube